
This guide provides step-by-step instructions to assemble a reliable car emergency kit. It is designed for vehicle owners who want to prepare for unexpected breakdowns, accidents, or roadside emergencies. By completing this task, you’ll have a kit that can help you manage common roadside issues safely and efficiently. The process is straightforward and can be completed in under an hour.

Get business pricing on garage and car supplies
- Business-only prices and quantity discounts
- Tax-exempt purchasing
- Multiple users, one account, clear invoices

Everlit Survival Car Emergency Kit with Tire Inflator, First Aid, Jumper Cables, and Safety Tools
- ✔ Tire Inflator: Digital auto air compressor with auto shutoff and LED light
- ✔ Jumper Cables: 12 feet, 8 gauge, 300 amp, UL listed
- ✔ First Aid Kit: 108 pieces including bandages, antiseptics, and CPR mask

Car Roadside Emergency Kit, Portable Car Safety Kit for Emergency, Black
- ✔ Material: PVC exterior, premium copper wire interior
- ✔ Color: Black
- ✔ Included: Essential emergency tools and supplies

Car Roadside Emergency Kit with Jumper Cables and Safety Tools
- ✔ Jumper Cables Gauge: 6 gauge
- ✔ Shovel Length: 16.5 inches
- ✔ Tools Included: Hammer, wrench, plier, tape measure, PVC tape, digital test pen, screwdrivers, hex keys
Difficulty: Beginner | Time: 30-45 minutes
What You’ll Need
Tools & Materials:
- Car manual (optional for reference)
- Pen and paper (for checklist)
- Basic hand tools (optional)
Knowledge:
- Basic understanding of vehicle safety and emergency procedures
Set aside a dedicated space in your vehicle to store the kit. Check local regulations about what items are permitted in your region, especially if traveling across borders.
Everlit Survival Car Emergency Kit with Tire Inflator, First Aid, Jumper Cables, and Safety Tools
This kit stands out for its extensive range of safety and repair tools, making it ideal for drivers who want to be prepared for almost any roadside scenario. It includes a digital tire inflator with auto shutoff and a comprehensive first aid kit, alongside jumper cables, tow straps, and safety accessories. Compared to more basic kits, it offers a broad set of resources but at the expense of some bulk, which might be inconvenient for smaller trunks. The high-quality jumper cables and detailed first aid supplies make this a top choice for safety-conscious users who prefer a one-stop emergency solution.
Pros:
- Includes a wide range of essential safety and emergency tools
- Compact and lightweight considering its scope
- High-quality jumper cables with safety features
- Comprehensive first aid kit for medical emergencies
Cons:
- The kit may be bulky for some vehicle trunks
- First aid supplies might be limited for longer trips
Best for: Drivers seeking a comprehensive, all-in-one emergency kit for regular road trips or unpredictable roadside incidents.
Not ideal for: Those with limited trunk space or who prefer a minimalist approach to car safety.
Bottom line: Best for drivers who want a thorough, all-in-one emergency preparedness kit without sacrificing safety features.
“Best for drivers who want a thorough, all-in-one emergency preparedness kit without sacrificing safety features.”
Car Roadside Emergency Kit, Portable Car Safety Kit for Emergency, Black
This kit emphasizes portability and ease of storage, making it ideal for drivers who prioritize quick access and simplicity. Its compact design with a PVC exterior allows it to fit neatly in a backseat or trunk organizer. While it covers essential safety tools, it lacks detailed information about specific contents or added features like jump starters or LED lights. This makes it suitable for those who want basic preparedness without bulk, but less ideal for drivers needing extensive repair options or comprehensive safety gear.
Pros:
- Compact and portable for easy storage
- Contains essential emergency tools
- Made with durable, premium materials
Cons:
- Limited detail about specific included tools
- No advanced features like jump starters or LED lights
- Limited information on contents’ comprehensiveness
Best for: Everyday drivers, families, or teenagers who need quick access to essential tools without extra bulk.
Not ideal for: Drivers seeking advanced repair tools or detailed emergency supplies for long trips.
Bottom line: Best suited for drivers who want a straightforward, portable safety kit for daily use and emergencies.
“Best suited for drivers who want a straightforward, portable safety kit for daily use and emergencies.”
Car Roadside Emergency Kit with Jumper Cables and Safety Tools
This kit offers a comprehensive set of tools for both roadside emergencies and basic repairs, making it ideal for drivers who want more than just safety gear. It includes a 6-gauge jumper cable set, a foldable survival shovel, and an array of repair tools like screwdrivers, pliers, and a wrench. The inclusion of a safety hammer, reflective triangle, and emergency blanket enhances its safety profile. Compared with the other options, this kit provides more repair-oriented tools, but it may be bulky and somewhat over-equipped for drivers who only need basic safety gear.
Pros:
- Includes a wide range of safety and repair tools
- High-quality jumper cables with insulated clamps
- Portable in a convenient carrying case
- Versatile survival shovel for multiple tasks
Cons:
- Some tools may be basic for heavy repairs
- Bulky for smaller vehicles
- Limited info on long-term durability of items
Best for: Drivers who want an all-in-one solution for roadside repairs, safety, and some survival capabilities.
Not ideal for: Those who prefer a lightweight, strictly safety-focused kit or minimalists who dislike carrying heavy tools.
Bottom line: Ideal for drivers who want a multi-purpose roadside kit that combines safety, repair, and survival tools.
“Ideal for drivers who want a multi-purpose roadside kit that combines safety, repair, and survival tools.”
As an Amazon Associate we earn from qualifying purchases.
Before You Start
Ensure your vehicle is parked on a flat, stable surface with the parking brake engaged. Gather all items listed below before beginning assembly to streamline the process. Review your vehicle’s emergency procedures in the owner’s manual for specific needs or restrictions.
Step-by-Step Instructions
Step 1: Gather all necessary supplies
Collect the items listed in the checklist below: first aid kit, flashlight, jumper cables, basic tools, bottled water, non-perishable snacks, reflective warning triangles, tire pressure gauge, tire repair kit, gloves, and a printed emergency contact list.
Tip: Use a sturdy, weather-resistant container or bag to store your kit items neatly and securely in your vehicle.
Check: All items are gathered and stored together in a designated container in your vehicle.
Step 2: Check and prepare the first aid kit
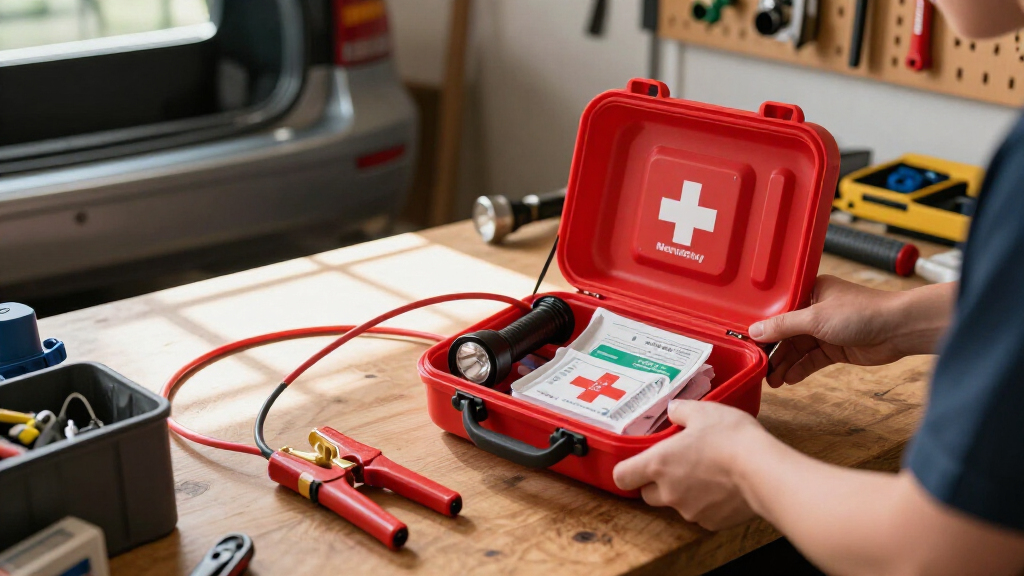
Inspect your existing first aid kit for expired items or missing supplies. Restock with bandages, antiseptic wipes, adhesive tape, scissors, pain relievers, and any personal medications.
Tip: Keep the kit in an easily accessible location, such as the glove compartment or trunk.
Check: First aid kit is complete, organized, and accessible.
Step 3: Test and charge the flashlight
Insert fresh batteries into the flashlight or recharge it if it is a rechargeable model. Turn it on to verify it works properly.
Tip: Replace batteries annually or when the flashlight shows signs of weak illumination.
Check: Flashlight functions properly and has fresh batteries.
Step 4: Inspect jumper cables and test connections
Uncoil the jumper cables and check for corrosion, frayed wires, or damage. Connect the clamps to a power source or another vehicle to verify they work.
Tip: Keep the clamps clean for good contact during use.
Check: Jumper cables are in good condition and functional.
Step 5: Stock bottled water and non-perishable snacks
Place bottled water and sealed snacks in your kit, ensuring they are stored in a cool, dry place. Replace items periodically to ensure freshness.
Tip: Opt for long-lasting, lightweight snacks like granola bars or nuts.
Check: Items are stored securely and are within their expiration dates.
Step 6: Set up warning devices
Place reflective warning triangles or flares in your vehicle. Practice setting them up at a safe distance behind your vehicle in a well-lit area.
Tip: Use warning devices immediately if your vehicle breaks down on or near the road to alert other drivers.
Check: Warning devices are ready for quick deployment and visible from a distance.
Step 7: Verify tire pressure and prepare repair tools
Use the tire pressure gauge to check each tire’s pressure against your vehicle’s recommended PSI listed in the owner’s manual or on the door frame. Pack a tire repair kit, including sealant and a portable air compressor.
Tip: Check tires monthly and before long trips for optimal safety.
Check: Tire pressures are correct, and repair tools are functional and accessible.
Step 8: Create a printed emergency contact and information list
Write down or print important contacts, including roadside assistance, local emergency numbers, and personal contacts. Store this list in your kit.
Tip: Update the list periodically, especially if your contacts or local services change.
Check: Emergency contact list is printed, complete, and stored securely.
Common Mistakes to Avoid
- Overloading the kit with unnecessary items — Include only essential items to keep the kit manageable and accessible.
- Neglecting to check expiration dates or condition of supplies — Regularly review and replace expired or damaged items.
- Storing the kit in an inaccessible place — Place the kit in a dedicated, easily reachable location, like the trunk or under a seat.
- Ignoring local regulations about safety equipment — Research regional laws about required safety items, such as warning triangles or flares.
Troubleshooting
Problem: Flashlight does not turn on after replacing batteries
Solution: Test batteries with a voltmeter or try a different set of batteries. Replace if faulty or damaged.
Problem: Jumper cables have corrosion or damaged clamps
Solution: Clean corrosion with a wire brush or replace damaged cables before use.
Problem: Tire pressure gauge shows inconsistent readings
Solution: Calibrate or replace the gauge. Confirm tire pressure with a second reliable gauge.
Problem: Warning triangles are damaged or missing
Solution: Replace damaged warning devices immediately and store replacements in your vehicle.
What Success Looks Like
The kit contains all essential supplies, is well-organized, and items are in good condition. You can quickly deploy warning devices, perform basic repairs, and provide first aid if needed. The assembled kit should be accessible, complete, and ready for use in an emergency.
Next Steps
Regularly check and top up supplies, replace expired items, and review emergency procedures. Practice setting up warning devices and using basic tools. Consider adding new items based on seasonal needs or vehicle changes. Keep your contact list updated and store your kit in a consistent, accessible location.
Frequently Asked Questions
How often should I check my emergency kit?
Inspect your kit monthly, checking for expired items, battery life, and overall condition. Replenish supplies at least twice a year or after use.
What are the most essential items to include?
Basic items include a first aid kit, jumper cables, warning devices, flashlight, bottled water, non-perishable snacks, tire repair tools, and a printed emergency contact list.
Can I customize my emergency kit for winter or other seasons?
Yes. Add items like extra blankets, ice scraper, snow chains, and warm clothing for winter. Adjust contents based on your climate and travel needs.
What should I do if I run out of supplies or need to replace items?
Remove used or expired items promptly and replace them with fresh supplies. Store replacements in the same designated area for consistency.
Halloween Picks
halloween
As an affiliate, we earn on qualifying purchases.